Recipe: Pink ombre cake with lychee jasmine cream
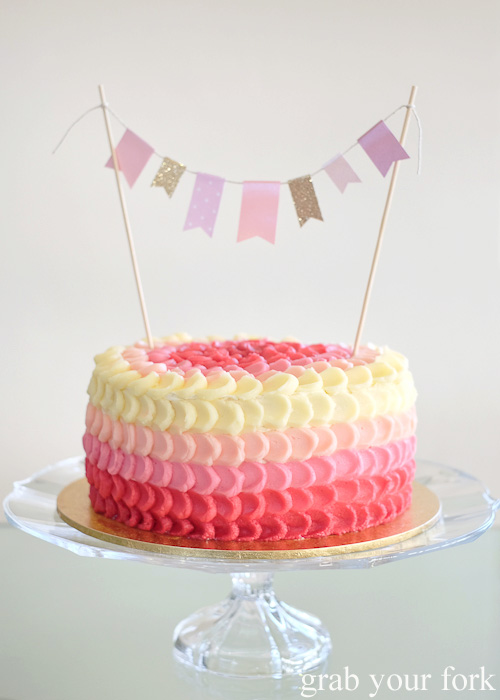
Ombre cake. This cake took me seven hours to make but the look on my friends' faces was easily worth the effort. Everybody loves cake but everyone loves a decorated cake even more.
Our Stomachs Eleven dinner party group recently held a surprise baby shower for J-girl and I'd volunteered to bring dessert. Sure I could have brought along a dozen cupcakes or a plate of cookies, but if ever there was a time to indulge in a pink buttercream frenzy, this was it.
But first, there was lunch. We had steamboat, or hot pot at M&L's place, a DIY affair of vegetables, meats and seafood cooked in pots of soup at the table. This is one of the easiest meals you can have with friends, and fighting with everyone else for the last fish ball is half the fun.
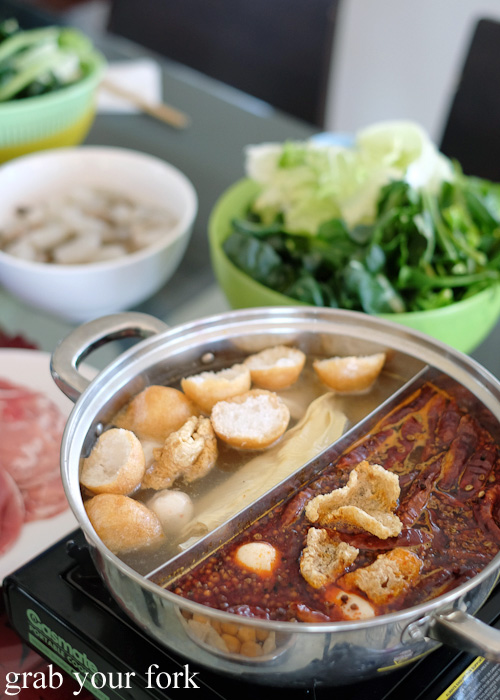
Twin-walled steamboat pot - chilli on one side, no chilli on the other
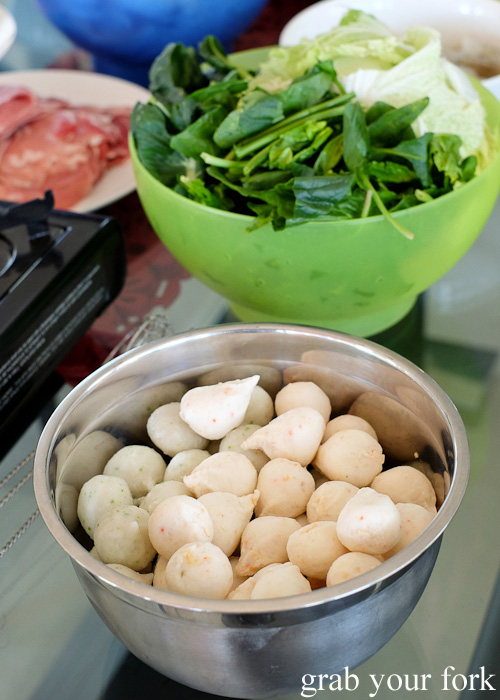
Fish balls filled with fish roe
If you haven't had these fish balls before, you must rectify this immediately. Bite into these spongy tear drops and you'll get an explosion of salty and sweet fish roe that bursts in the mouth. You can get these from the frozen section in large Asian groceries.
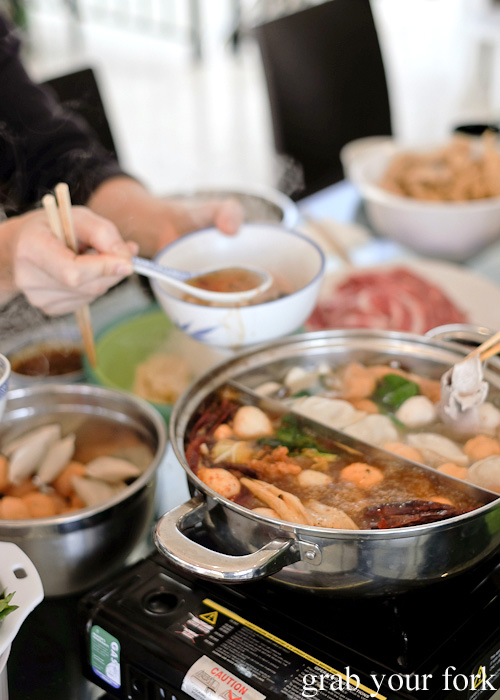
Cook your own as you go
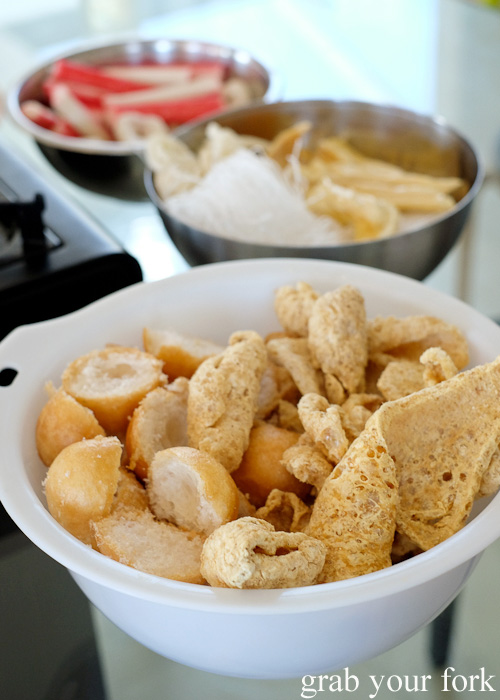
Tofu puffs and dried pork crackling
The dried pork crackling rehydrates into a soggy water-logged sponge but the taste of crackling (or crispy pork fat) is unmistakeable. It's strangely addictive.
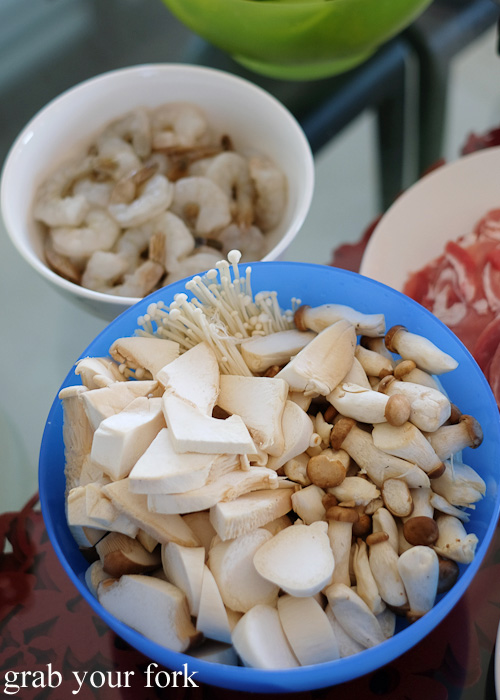
Shiitake, shimeji and bailing mushrooms
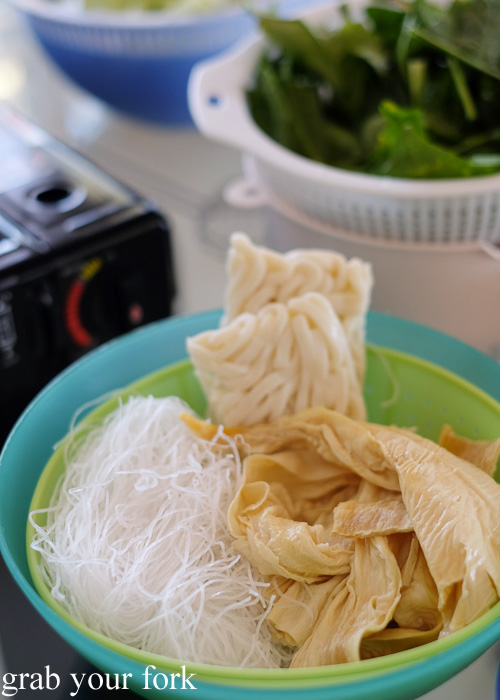
Vermicelli noodles, udon noodles and dried bean curd sheets
The unspoken rule of steamboat is that noodles should go in towards the end as the starch will affect the taste of your soup.
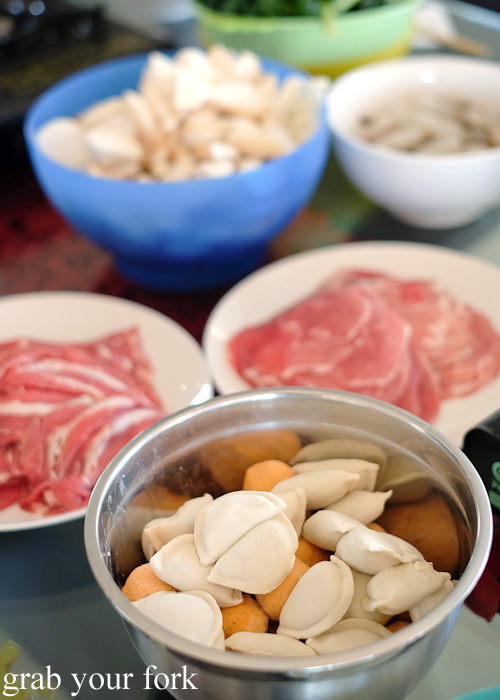
Dumplings and fish balls
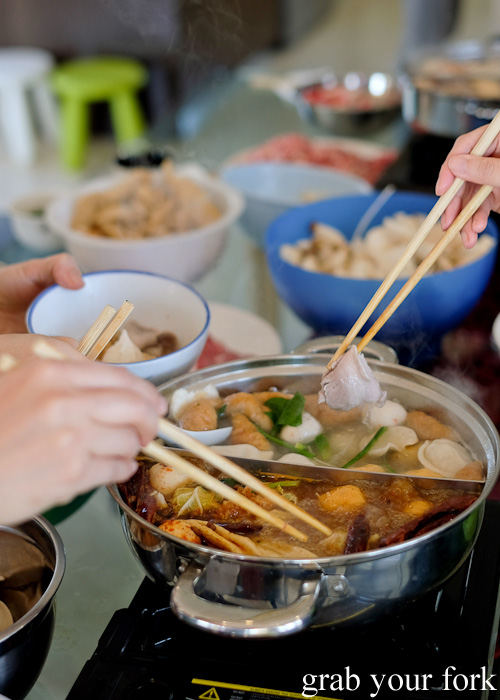
Everybody's fishing
And then it was time for dessert!
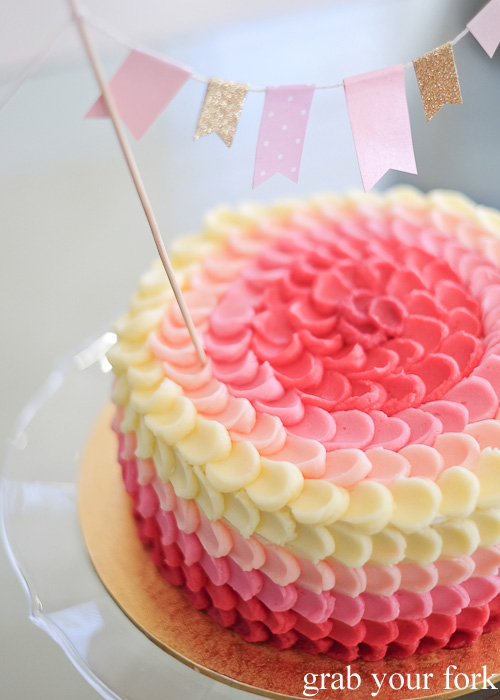
This was my first time making an ombre cake, including the petal buttercream icing technique used across the top. It's not perfect but I was just glad it didn't turn out to be a total disaster!
Recipe: Lychee jasmine pink ombre cake

I flavoured my cake with lychee and jasmine but you could easily modify this to flavourings of your own choosing. I used Steph's ombre cake recipe and Billy's ombre icing with my own adjustments as detailed below.
Ingredients
Cake
355g plain flour
1 Tablespoon baking powder
1/2 teaspoon salt
200ml milk
2 teaspoons vanilla extract
225 unsalted butter, softened
400g caster sugar
4 medium eggs
Pink food colouring (you can also use red)
Cream
500ml thickened cream
425g tin of lychees, drained
jasmine essence to taste
Icing
600g icing sugar, sifted
300g salted butter
2.5 Tablespoons milk
Pink food colour (you can also use red)
Specific tools and utensils
20cm baking tins
Electronic scales
Separate piping bags for each icing colour
Method
Preheat oven to 180°C (350°F). Grease and line 4 x 20cm round cake tins (if you have less, you will simply need to wash and dry however many tins you have between each use).
Combine the flour, baking powder and salt in a medium bowl, mix well and set aside. In a separate jug or mug, mix together the milk and vanilla extract.
Cream the butter and caster sugar using an electric mixer, starting at low speed and gradually increasing to high. The mix should be soft and creamy with no graininess between the fingers. This should take at least four minutes and up to ten.
Reduce speed to medium and add eggs one at a time, beating each one well before the next addition. Add in 1/4 of the flour mixture and mix in at medium speed. Add in 1/3 of the milk mixture and mix in at medium speed. Continue adding the flour and milk at these ratios, ending with the final 1/4 of flour.
Divide mixture between four bowls, using electronic scales for accuracy. Leave one portion of batter plain. Add increasing amounts of pink food colouring to the others until you get the gradient of shading you prefer.
Transfer the batter to the lined cake tins and bake for about 15-20 minutes or until a skewer inserted into the centre of the cake comes out clean. Allow to cool in the tin for 5 minutes before turning out onto wire racks to cool.
Making the lychee jasmine cream
Trim as much membrane from the lychee fruits as you can, but do not throw away. Place the cleaned lychee pieces in a bowl to one side. Place the membrane-lined flesh into a blender and blitz until pulverised.
Whip the cream until soft peaks form, adding in several drops of jasmine essence to taste. You want it reasonably strong in flavour as you want to be able to taste it when it's sandwiched between the layers of cake. Fold in the blitzed lychees. Keep the lychee cream in the fridge until you're ready the assemble the cake.
(Note: you can skip the trimming and blending part if it's too much hassle, but I find the membrane does have an unpleasant texture if you simply fold the untrimmed lychees into the cream).
Making the icing
Using an electric mixer, beat the butter until light and fluffy. Add a small amount of icing sugar and whip on low speed until incorporated. Use a mixing bowl cover if you have one, to prevent the icing sugar flying everywhere. Continue adding the icing sugar in small amounts until it has all been incorporated. Add the milk. Beat the icing for longer than you think is required. The longer you beat it, the whiter it will become.
Divide the icing into bowls according to the number of shades you prefer. If you are going to dirty ice your cake (adding a thin layer of icing between the cake and the final icing on top), then make sure you set this aside. I had five colours so divided my icing into 1/3 white, then 1/6 for each shade of pink. Add increasing amounts of pink food colouring to each bowl until you're happy with the gradient of shading.
Assembling the cake
Trim the tops of the cakes if necessary, otherwise work out which way you are going to lay down each cake layer so they lay as flat as possible. Place the darkest shade of cake on the bottom and slather generously with your cream mixture. Dot with the fresh trimmed lychee pieces. Continue stacking the cake with cream and lychee until complete.
Use a spatular to dirty ice the top and sides of the cake with un-tinted icing. This will create an even surface for your final icing (especially between the layers of cake) and will stop loose cake crumbs spoiling your icing. It will also stop the yellow cake showing through if you have any gaps in your piped icing. You only need a thin layer of dirty icing and it doesn't have to be perfect. Noone will see it.
Transfer each shade of icing into a separate piping bag. Warning: I tried using ziplock bags but they kept bursting on me. Then I remembered I did have a stash of disposable icing bags. Doh! Skip the heartache and transfer them straight into proper piping bags - either disposable or cloth.
Start from the sides and pipe one dollop of icing. Find the smallest teaspoon you have, and use this to depress the centre of the dollop and then drag until you get what looks like a tongue or smear. Wipe the spoon clean with a tissue so you don't taint your next colour. Pipe the next colour along your vertical line and smear it with your spoon. I started at the top and went downwards, but in hindsight, maybe I should have gone bottom-up (you can see I ran out of room at the bottom, even though I tried marking out my horizontal rows).
When you are ready for your next row, pipe over the existing tongue/smear at the position where you want your next petal to start. It helps to practise on a piece of baking first so you can work out the petal length you prefer. I also watched lots of YouTube videos beforehand to see how other people did it. The top of the cake is particularly tricky as you have to make sure you're piping in even circles. Stop and stand back every now and then to check your concentric evenness.
Add bunting flags on top (thanks Silvrlily!) if you like. I found they did help to create height for the cake, and a great sense of occasion. You can do all kinds of petal icing variations, including vertically aligned petals, or diagonally alternating shades of colours. Do an image search of "ombre petal icing" and choose your favourite :)
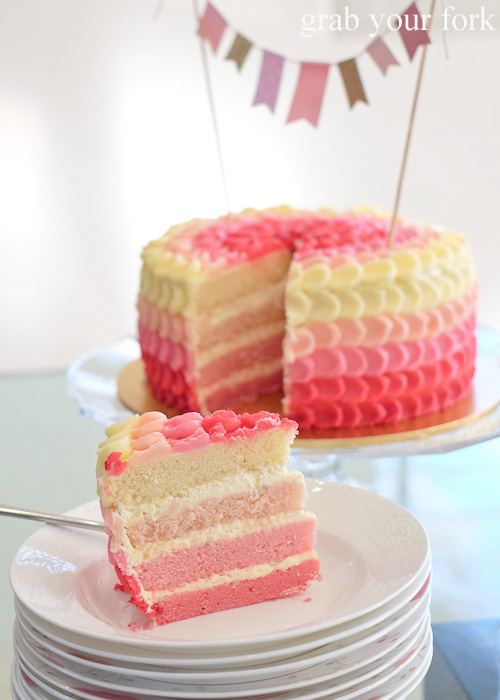
But enough talk. Give me the cake! Everyone was dying to see what it looked like inside and there was a room full of oohs and aahs when the first slice was cut. After making a cake like that, I reckon you deserve at least three slices to yourself. I know I did. I should have had more :)
Related Grab Your Fork posts:
Cake - Green tea sponge cake with red bean
Cake - Upside-down pear and macadamia cake
Cupcakes - Black sesame cupcake cones
Cupcakes - Chocolate bacon cupcakes with maple frosting
posted by Helen (Grab Your Fork) on 8/13/2014 07:54:00 pm


25 Comments:
At 8/13/2014 8:27 pm, Hilda said…
It looks beautiful!! Fantastic job! I'm definitely not game enough to tackle this cake. I spent almost 5 hours literally at the stove making a thousand layer Indonesian cake and I haven't been quite as adventurous in the kitchen since haha
At 8/13/2014 9:48 pm, Stephcookie said…
Gorgeous Helen! I hope you liked the cake recipe. As someone who has experienced a petal icing disaster first-hand, your cake is super impressive and super pretty. Lovely! The bunting is really cute too!
At 8/13/2014 10:25 pm, Tina@foodboozeshoes said…
What a stunner of a cake - well done! I'm pretty sure I don't have the patience to spend 7 hours on a cake... :(
Never heard of pork crackling in hot pot either!
At 8/14/2014 1:35 am, Gourmet Getaways said…
Such a pretty cake! Pink is it!
Julie
Gourmet Getaways
At 8/14/2014 2:33 am, Padaek said…
Such an awesome looking cake!! I'm sure it's not just a pretty cake, but tastes sensational too. Great recipe and instructions. That steamboat hotpot looks hot! Yum. :)
At 8/14/2014 9:40 am, Jacq said…
Wow nice job with the cake, it looks amazing and I bet it tasted amazing too!
At 8/14/2014 10:37 am, Swah said…
Oh my god this cake is AMAZING! I totally feel your pain with the time and stress involved in making an ombre cake, my mini ones took hours and lots of swearing haha.
At 8/14/2014 11:18 am, Anonymous said…
Yum i love lychees and have never tried it in a cake. I can only imagine the awesomeness!! And also what a great time for hotpot
At 8/14/2014 11:28 am, ChopinandMysaucepan said…
Dear Helen,
I didn't know that you bake as beautifully as you take photos and write, so much talent!!
At 8/14/2014 12:51 pm, Fleur @ Changing Shores said…
Wow! Stunning cake!
At 8/14/2014 3:32 pm, Cassie | Journey From Within said…
That cake looks amazing, pretty sure it was worth 7 hours!! Kudos to you, I have absolutely no patience haha
But omg yes fish balls with fish roe is omg awesome!
At 8/15/2014 12:39 am, pigflyin' said…
way too modest! the cake is perfect, delish and PINK! I walk by the cake at least a couple of times before it dawn on me that it is not shop brought! it is equally amazing when the cake is cut and reveal the perfect layers. The maost amazing thing is how well jasmine and lychee works together.
Yumm!
At 8/15/2014 3:03 am, Unknown said…
Hi Helen,this cake is nothing short of a work of art! Love the delicate hues of ombre petals as they cascade down to the base. It's a stunning cake, totally fit for a little princess or prince, to be! ps, I always crave hot pot, always!!!
At 8/15/2014 7:47 am, john | heneedsfood said…
Seven hours for a cake! Now that's some dedication. And you've gotta love that bunting!
At 8/15/2014 8:00 am, Unknown said…
Helen! That cake looks amazing! Well done :)
At 8/15/2014 4:41 pm, Maddie Loves Food said…
This cake looks absolutely gorgeous, well done!!! I love the sound of the lychee cream filling, and the petal icing looks divine. The hot pot looks so yummy, my favourite bit is adding the noodles to the flavoured broth at the end, and I also love the dried bean curd sheets! Yum!
At 8/16/2014 6:39 am, Anonymous said…
Seven hours! Heroic effort. I am totally hopeless with a piping bag.
At 8/16/2014 6:11 pm, Martine @ Chompchomp said…
Your friends dont know how lucky they are to have you. That is a serious time investment for a cake. But then look at what a work of art you created! Respect! xx
At 8/16/2014 6:37 pm, Sarah said…
Oh wow! That cake looks INCREDIBLE! Amazing job!!!
xox Sarah
At 8/18/2014 1:29 pm, missy vas said…
She is a really beautiful cake - Im going to make it, but I am certain it wont look as beautiful as this one!
At 8/18/2014 1:59 pm, irene said…
This look amazing! So pretty and girlish! :)
At 8/19/2014 11:43 pm, Amanda @ Gourmanda said…
It looks absolutely wonderful! Must have taken ages, I don't think I've got the patience for it.
I love doing hotpot with my friends as well, it's such a great way to share a meal!
At 8/20/2014 12:45 am, Felicia @ Next Stop: Food said…
omg it's gorgeous!!! all the colours and petals looks so perfect
At 8/22/2014 11:07 pm, Berny @ I Only Eat Desserts said…
SAH PRETTY <3 Love how the colours just go from one colour to the next so easily~
At 9/23/2014 7:19 am, Sara | Belly Rumbles said…
Stunning Cake Helen!
Post a Comment
<< Home